
Over time, webinars or web-based seminars have gained a lot of popularity, majorly because of the various benefits they offer to the users. Webinars serve as an effective means of communication between you and your desired audience. It eases your dealings with customers, employees, and prospects, and also offers an outstanding personalized experience.
Also, for upcoming entrepreneurs and businesses, it creates a suitable platform for collaboration with business partners to make decisions and also perform other actions such as making sales pitches, performing product demonstrations etc., to several people at once.
Making appropriate use of this medium can give remarkable feedback and results with a longstanding effect. In this article, I will be introducing webinars to you in a better way, why you need them and how you can have webinars integrated into your WordPress website.
What you need to know about webinars and why your business needs it
Webinars are simply seminars conducted over the web or the internet. They can be in the form of meetings, presentations, workshops, and training.
Webinars are a highly useful and effective way to interact with thousands of people in different locations at the same time. As opposed to posting videos on various platforms to communicate with your desired audience, webinars create a platform for real-time interaction to produce the required results. In webinars, every attendee is presented with the chance to participate actively by speaking, asking, or answering questions.
This type of seminar provides you with an opportunity to give your customers and business partners an outstanding personal experience when they come in contact with your business. As a newbie or upcoming entrepreneur, this can quickly grow your business and improve sales.
To help host integrated webinars from your website, several great companies provide webinar software at affordable prices for a specific range of time. Some of these companies include WebinarJam and EasyJam amongst many others. This software comes with various subscription plans with varying prices, with the annual subscription plan being the most pricey.
However, the prices are justified given the features they come with and the benefits your business is likely to gain from them.
For upcoming entrepreneurs or business owners, these prices may pose a problem, but not to worry, there are many other free alternatives that come along with useful features. A few examples will be discussed extensively in this article.
Google hangouts on-air
A suitable choice for new entrepreneurs and business owners
This is where I started. Google Hangouts on Air happens to be a great choice for new business owners, not just because it is free but because it also offers the necessary features for your business. Some of these features include automotive recording, live chats, and Digital Video Recorders (DVR). This webinar platform (formally accessible through Google+) is accessible through YouTube Live.
Because it is free, it is a suitable option for individuals who are either unable to afford paid platforms (such as new business owners). It is also great for individuals who would like to perform a test-run of webinars on their website and identify its effect on their business before paying for and utilizing paid platforms.
It is important to note that, like every other platform, Google Hangout on Air also comes with some downsides. One of which is the need to create a Google Adsense account before you can be granted access to this platform. Also, although this platform has the live chat feature, individuals who aren’t able to or comfortable using YouTube will be unable to make use of this feature. This is because the live chat feature does not support the use of embedded players.
Some outstanding features of the Google Hangout on Air platform include:
- Automatic recording of your webinar
- Live chat feature
- Allows for the promotion of your webinar through your YouTube page.
These features play a great role in enabling you to run a hitch-free webinar to promoting your business on your website. Given your newly gained knowledge, we would discuss succinctly how you can make use of the Google Hangout on Air with your WordPress website.
How to host an integrated webinar on your WordPress website
Given the recent transfer of Google Hangout on Air from Google+ to YouTube Live, a lot of individuals have found it difficult to continue hosting webinars on their WordPress website. Therefore, making this article not only important to new entrepreneurs or business owners but also old ones who make use of this platform.
Although simple, it is quite confusing. All you have to do is use your Google sign-in details to sign in to YouTube Live. However, individuals who are new start-ups may need to make use of a different process.
The process is as follows.
1. Create a Google Account
This step, just as the platform is free. If you use G-mail you already have one. If you don’t have a Google account yet, it is necessary for you to create one. Open your browser, search for the Google Sign Up page, fill in the necessary details, follow the instructions stated in the page, and create your account.
Link: accounts.google.com/signup
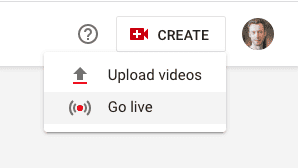
2. Open YouTube Live
Creating an account with Google automatically grants you access to YouTube Live. While you are signed in to your Google account, go to your YouTube Live.
- Go to studio.youtube.com
- Click on the menu located on the left side of the page and click on My Channels amongst the options.
Note that, the name you are identified with is the same as that which you filled in whilst creating your Google account. This name cannot be modified. Also, do well to read carefully the terms and conditions of YouTube Services before moving further to Create your YouTube channel.
Once this is done, to create an event, all you need to do is click on the menu located at the top left side of your screen.
Then,
- Click on the Live streaming option.
- Afterward, click on Events,
- Then click on the Enable Live Streaming button located in the middle of the page.
- You will be required to enter your Country of residence and also verify your YouTube account, either through a text or an automated voice message sent to you.
- After the verification process is completed, click Continue.
- Next, click on the Create Live Event button and enter the necessary details for your webinar where needed. Before this is done, ensure that you have a decision date, time, and title for your webinar.
- Under the Type options, select Quick for Hangout On Air. On this page, you can also select how public or private you want your event to be. You could select between Public (for everyone), Unlisted (anyone with access to the link), or Private (those you have personally invited).
3. Personalize Your Webinar
Once you have entered the basic details describing your Webinar, click on the Advanced Settings Tab to further enter more details describing your webinar. Under this tab, there are several options, ranging from enabling live chats, setting categories, locations, assigning license and rights ownership, and much more. An important feature here, that would be most beneficial to your business is the Promotion option.
This feature allows YouTube to promote your webinar during the live stream. You can also adjust the recording settings by enabling DVR, which in turn allows your attendees to leave and join the webinar at will. These amongst other changes can be made. Once you are done making the necessary changes, do well to click on the Save Changes button.
4. Time To Integrate Your Webinar Into Your WordPress Website
Please note that integrating or embedding your webinar into your WordPress website would nullify or cancel the functionality of the Live Chat feature. However, there is no cause for panic as this can be fixed using the WP Live Chat support plugin or even by making use of the chat session on the website page where you intend to embed or integrate your webinar. Although these methods may not produce results as good as that of the YouTube Live Chat feature, they can give you something close.
To get the Webinar embedded in your website, copy the link/URL to your webinar and paste it into the page where you want it embedded. When you do this, you will see your Google identifier on your screen and a Play button alongside it. Clicking the Play button would cause a countdown timer to appear.
However, once the webinar begins, this button would function as it should.
If you make use of Divi, you can embed the webinar using the *Video Module*. In addition to this, you can also modify the style of your video.
Next, check the upper right-hand corner of your screen (on your website), and click on View in Watch Page. On clicking this, you will be redirected to your YouTube page, where your webinar would be aired. The page to which you will be redirected will be blank, displaying a countdown to the date you fixed earlier.
5. What’s a Webinar Without Attendees? – It’s Time To Invite Attendees
A webinar isn’t a webinar until you have attendees. Once you have set everything in order, it is time to reach out to your desired audience.
There are different ways through which you can have this done. Some of these include the use of social media (through hashtags and more), Email newsletters, blog posts, sharing videos, and flyers.
However, a great way to start out is by sending the link alongside necessary information about your webinar (such as the date and time) to the members of your mailing list. Ensure that you also include the usefulness of this webinar to your subscribers in order to be able to get them to participate.
It is also possible to reach out to people who aren’t part of your subscribers. In order to do this, there are several promotional strategies made available to you. Some of them include creating informative pop-ups, creating informative and dedicated landing pages about your webinar. It is essential that you continually send reminders to your invitees as the date of your webinar draws closer.
6. Stream Your Webinar!
You have done everything necessary, what you do next is to stream your webinar. Whether you are a pro or amateur in giving presentations, the importance of planning cannot be overemphasized. Ensure that you make the necessary plans for your webinar before you live to stream it. You wouldn’t want your attendees to grow weary or tired half-way into your presentation. To deliver a great presentation to your attendees, here are some tips that may come in handy.
- TOPIC AND CONTENT MATTERS. Ensure that the chosen topic is important to your attendees, and the content focuses on broadening their understanding of the topic. You should also make good of suitable mediums to pass your message across on this platform, that is, through slides, audios, and videos.
- CHOOSE A SUITABLE FORMAT. Try to choose the format through which you would like to communicate with your audience. Would you want full participation, partial participation, or strictly a presentation format?
- THE MORE SPEAKERS, THE MERRIER. Having more than one speaker at your webinar helps to spice things up. If you can, try your best to engage more than one speaker during your webinar in other to keep your attendees interested throughout the webinar.
- TOO LONG, TOO BORING. It is advisable that you keep your webinar within an hour’s length. This helps to maintain the attention span of your attendees throughout the session.
In addition to this, it is important that you put into focus, other issues that are likely to arise during your webinar. Some of these include technical issues, connection problems, and so on. Because of these uncertainties, you may need to find someone who can assist or take over from you should in case any issues come up. You will also need to carry out a test-run a few days before the allotted time for the webinar to ensure that necessary features such as audio and visuals are working perfectly.
7. Start The Broadcast
To begin broadcasting your webinar, go to the YouTube Live Events page. On opening this page, you would be required to enter your Google login details again before you can be taken to the broadcasting screen. When you get there, click on Start Broadcast and begin.
Note that, you can always share the recording of the webinar with anyone who was unable to attend the webinar. Your YouTube Live URL will always remain the same and embedded into your website, except you make any changes. This would allow you to play webinars from your website for as long as the link remains embedded. Ensure that your webinar is engaging and interesting in order to entice subscribers to return for future webinars. Ensure that you keep promoting your website, business, and webinars through the use of social media.
Final Thoughts
Remember, webinars are a great way to communicate or interact with customers, potential customers, employees, and prospects. Although they can be resourceful, the process of organizing a webinar and embedding it into your website can be tiresome and sometimes confusing. There are several paid platforms through which you can embed and host webinars from your website. There are also some free ones, such as Google Hangout on Air, which has been explained in this article. All information considered necessary to you has been given above and explained, and plainly as possible, ensuring you make good use of it.